Publishing an app on the App Store for the first time comes down to one sequence: join the Apple Developer Program, create a record for your app in App Store Connect, upload a signed build from Xcode, test that build with TestFlight, fill in the listing and privacy details, then submit the version for review. A careful first-timer can do this in a single focused week once enrollment clears, and most of the work is paperwork rather than code.
The part that catches people out is not the upload. It is the review, because Apple tests the exact build you submit and rejects anything incomplete, broken or thin on detail. What follows covers every step in order, with the interface names you will actually see and the small mistakes worth avoiding.
Table of Contents
- What You Need
- Step-by-Step: How to Publish an App on the App Store for the First Time
- 1. Enroll in the Apple Developer Program
- 2. Prepare the app in Xcode
- 3. Create the App Store Connect record
- 4. Upload the build to App Store Connect
- 5. Add the listing details and privacy information
- 6. Test the app with TestFlight
- 7. Submit the app for review
- 8. Check approval and publish the release
- Common Mistakes
- Frequently Asked Questions
- Do I need to pay to publish an app on the App Store?
- How long does it take for Apple to review a first app submission?
- Do I need to use TestFlight before submitting my app?
- Can I invite TestFlight testers without App Review approval?
- What should I do if my first app is rejected?
- Conclusion
What You Need
Before you open Xcode, gather these six things. Missing any one of them sends you back to the start at review time.
- Apple Developer Program membership. This is a paid annual membership, renewed yearly. Individual enrollment is open to anyone with an Apple Account. Organization enrollment requires a real legal entity, a D-U-N-S number and a work email address on the company domain, and Apple may verify the business by phone.
- A Mac with Xcode. Apple requires a Mac to build and submit an iOS app. Xcode is free, and the current version of Xcode and its bundled iOS SDK are what Apple’s store expects for new uploads.
- An app icon at 1024 by 1024 pixels, plus real screenshots taken on an iPhone display size the App Store accepts. Mockups with fake phone frames and placeholder text are a routine rejection trigger.
- A public privacy policy URL on your own site. It must be reachable without a login and must describe what the app collects.
- A support URL with a real way for a reviewer or a user to reach a human.
- App Store Connect details: the exact app name, primary language, a reverse-DNS bundle identifier, an internal SKU, and an age rating.
Above that, decide who owns the developer account. For a client or an employer, the account should sit with the company, never with the contractor or agency. An agency that holds the account controls your listing, your releases and your revenue.
One more item that catches civic and community apps: if you collect location, camera or photo-library access, you need purpose strings written in plain language that says why your app needs the permission. Vague text is a rejection, not a warning.
Step-by-Step: How to Publish an App on the App Store for the First Time
1. Enroll in the Apple Developer Program
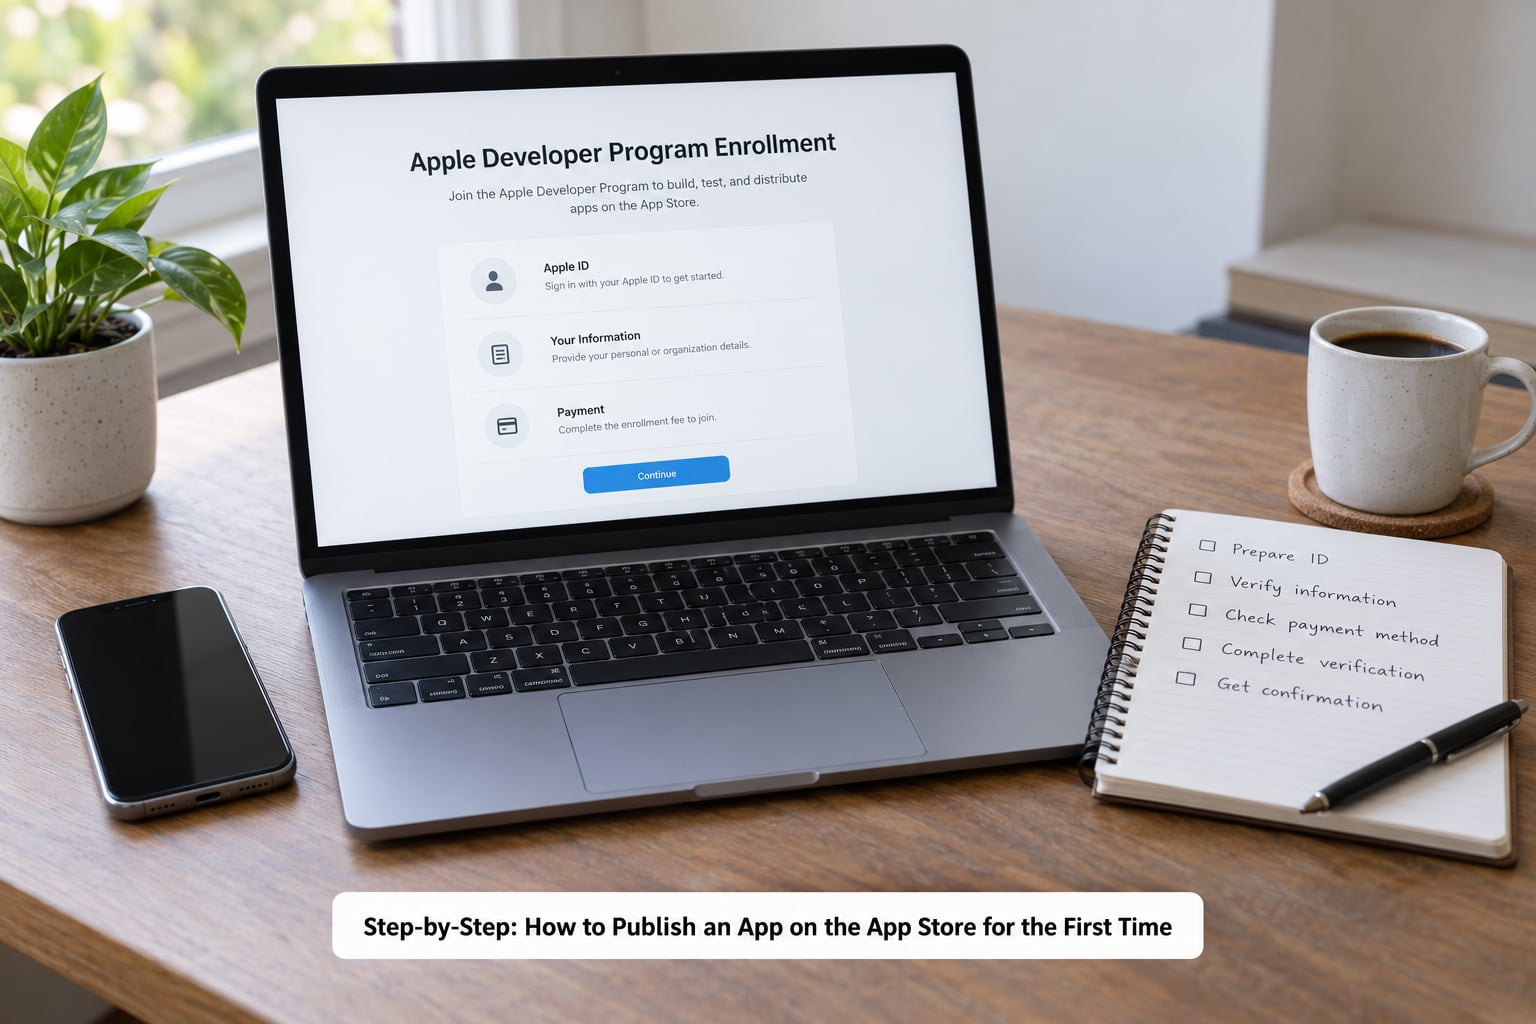
Create an Apple Account if you do not have one, then visit the Apple Developer site and start enrollment. You choose between an individual account and an organization account, and the difference shows up later: an organization account can list a team name on the App Store, while an individual account lists your personal name.
Pick the option that matches who owns the app. You then enter legal and contact information, accept the paid applications agreement, and complete identity verification. If Apple needs to verify an organization by phone, have your company paperwork nearby, because the call can come at an awkward moment.
You will know enrollment worked when your membership shows as active in the developer dashboard and the App Store Connect link unlocks. If you enrolled as an organization, expect a delay while the D-U-N-S lookup completes; that is the step most likely to add days to your launch timeline.
2. Prepare the app in Xcode
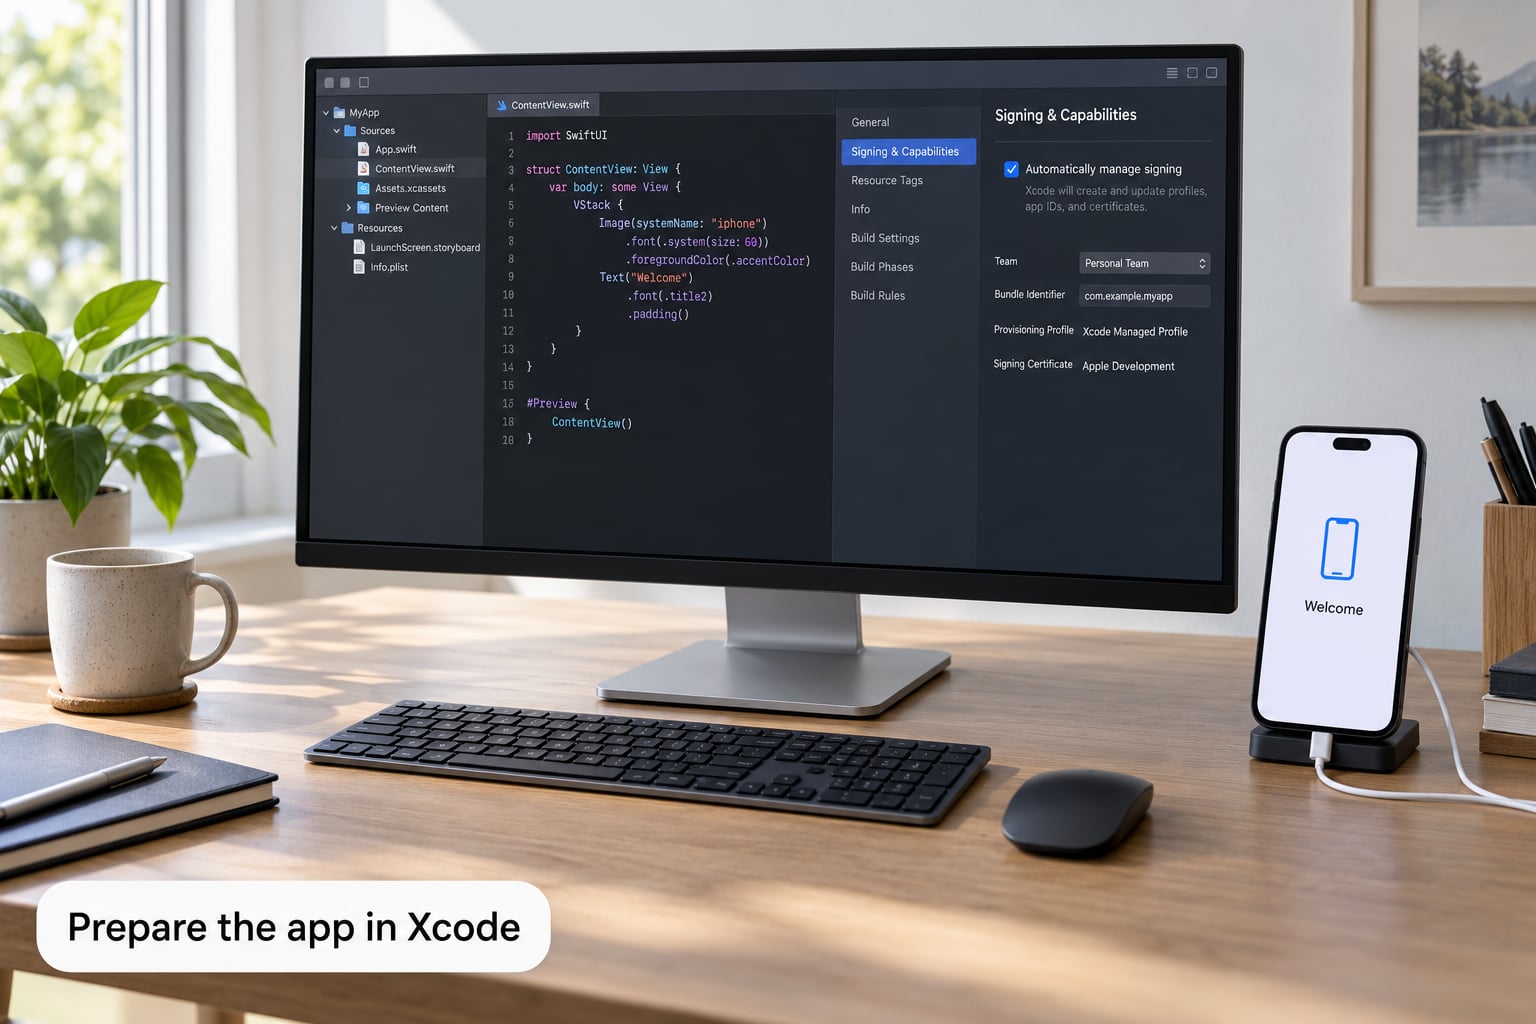
Open your project in Xcode and confirm the bundle identifier matches the one you will register in App Store Connect. In Xcode, the path is Project in the workspace navigator, then the app target, then Signing & Capabilities in the settings inspector.
Set your team under Signing & Capabilities so Xcode can generate a provisioning profile automatically. Signing is the single most common reason a first build will not upload, and it always traces back to a mismatched bundle ID, an expired certificate or a missing capability.
Then set your version numbers. The marketing version is the number users see on the App Store, and the build number is the internal counter that has to increase for every upload. Release builds go to any connected iOS device in the destinations menu, and you should confirm the app builds and launches on a physical iPhone before you go any further.
3. Create the App Store Connect record
Open App Store Connect and choose My Apps, then the plus button, then New App. Choose iOS, enter your exact app name, primary language, bundle identifier and SKU, and set user access to your team only while you build.
Pick a primary category and secondary category, complete the age rating questionnaire, and save. The record exists now, and this is the earliest point where you can attach your privacy policy URL and support URL.
Double-check the bundle identifier character by character. It is case-sensitive, and once your first build is attached to the record you cannot change it without a new identifier and a fresh App Store Connect entry.
4. Upload the build to App Store Connect
In Xcode choose Product, then Archive with the scheme set to your app and a real device or generic device as the destination. The Organizer window opens once the archive finishes. From there choose Distribute App, then App Store Connect, then Upload, and let Xcode validate before it sends the build.
Validation runs through signing, entitlements and your Info.plist, and it catches most problems before Apple does. Uploading can also go through Apple Transporter if you are not using Xcode.
Wait for processing. Builds appear under the app record with a state, and you will see it move to Ready to Submit once processing finishes. Only then can the build be attached to a version.
5. Add the listing details and privacy information
The listing is where most rejections happen, and almost always for missing detail rather than bad design. You need a subtitle, promotional text, a full description, a keywords field, a support URL, an optional marketing URL, an age rating, a copyright line and contact details for the review team.
Screenshots must match the app as it actually looks on the device sizes you upload for. Upload the real app running against real or plausible data, with readable text and no placeholder strings.
Complete App Privacy details next. You declare the data types your app collects, whether it is linked to identity, and whether you track users across other companies’ apps and websites. This section has to match what your binary and your privacy policy say. A mismatch here is one of the most common causes of a Guideline 2.1 rejection, and reviewers check it by hand.
Answer the export-compliance questions honestly too. If your app uses encryption, you declare it, and you may need to attach documentation explaining why your use qualifies for an exemption.
6. Test the app with TestFlight
TestFlight is Apple’s distribution tool for builds that are not public yet. Internal testers are people on your App Store Connect team, and you can add up to 100 of them. They get a build within minutes of processing, with no Beta App Review involved.
External testers are people outside your team, up to 10,000 of them. You add them to a beta review group, and the first external build passes through Beta App Review before invitations go out. That review step is slow, but it is worth it because it surfaces crashes and confusing onboarding before a full submission stalls on the same problem.
What to test on that exact build: sign-in and account creation, every permission prompt, offline behaviour, notifications, purchases or subscriptions if you have them, accessibility settings, and the privacy labels against what the app really does.
Read internal feedback first, since it arrives as plain messages with device details. Treat external feedback as broader and noisier, and fix anything that gets mentioned twice before you submit.
7. Submit the app for review
Go to the version in App Store Connect, attach the processed build, fill in the review information, and confirm the export-compliance answers for that version. Review information includes your contact details and a demo account with working credentials when the app requires a login. Reviewers use those credentials directly, so a stale password means an automatic rejection.
Write review notes that explain anything unusual: a hardware requirement, a backend server that must be live during testing, a location limited to a city, or a feature that looks incomplete but is intentional. Notes fields have a size limit, so keep them short and specific.
Choose manual release, automatic release after approval, or a scheduled date. Manual release is the sensible first choice, because it lets you confirm the listing looks right before anyone downloads anything. Then submit the version for review.
8. Check approval and publish the release
Monitor the app’s status in App Store Connect. Most submissions clear quickly, but individual developers report first apps sitting in review for a week or more, and that is not unusual. Do not cancel a submission that feels slow; cancelling drops your queue position and marks the submission as developer rejected on your record.
If Apple rejects the version, you get a message naming the guideline. Fix the underlying problem, reply in the Resolution Center with a short factual explanation of what changed, and resubmit. Rejections for incomplete apps, missing demo access and placeholder content are the most common, and experienced developers still get rejected on apps they have shipped many times.
On approval, release manually or let it go out automatically. You can also use a phased release, which rolls the app out to a percentage of users first, which is a sensible option if you want crash reports before everyone gets it. If the app is approved but your search listing has not appeared, wait, then check the public URL directly, since indexing often lags approval.
Common Mistakes
Most first submissions fail on one of a handful of predictable mistakes. Here is what to check before you hit the button.
- Mismatched bundle identifiers. The one in Xcode and the one registered in App Store Connect must match exactly, including case. Verify it once more before you upload.
- Missing or wrong signing. An expired certificate or a profile without the right capability stops the upload at validation. Signing & Capabilities in Xcode will tell you.
- Invalid screenshots. Wrong display size, unreadable text or mockup frames all cause rejections. Upload the real app.
- Incorrect privacy answers. If your App Privacy declarations do not match your code and policy, a reviewer will find the gap.
- No working demo credentials. Any login-gated feature needs credentials that work, plus a note explaining special setup.
- Unfinished metadata. A placeholder description, an empty support page or a missing copyright line all get flagged.
- Crashes or broken links. Run the submitted build end to end once more. Crashes on launch are the fastest way to fail review.
- Submitting a development build. The build reviewers test must be the same archive you tested. If you changed code after archiving, upload again.
One habit covers most of these: run the full pre-submission checklist against the exact build number you are about to submit, not against an earlier one. Interface labels shift between macOS, Xcode and App Store Connect releases, so follow the current labels in your own account rather than a screenshot from a guide.
Frequently Asked Questions
Do I need to pay to publish an app on the App Store?
Yes. Membership in the Apple Developer Program is a paid annual subscription, and you cannot submit a build or create an App Store Connect record without an active membership. The fee covers the program, TestFlight and App Store Connect, and certificate management. It does not cover icon and screenshot design, a Mac, testing devices, developer time or the commission Apple takes from paid downloads and in-app purchases.
How long does it take for Apple to review a first app submission?
Most submissions are reviewed within a day or two, and Apple publishes a figure suggesting the large majority clear inside 24 hours. First-time developers should budget more. Individual accounts report first apps sitting in review for a week or even longer, and an organization account adds time at the front while the D-U-N-S and business verification completes. Plan two to four weeks from enrollment to a live first release.
Do I need to use TestFlight before submitting my app?
Technically no, Apple does not require it. Practically yes, because reviewers test the exact build you upload. TestFlight gets that build in front of real devices, on real networks, before Apple sees it, which is how you catch crashes, broken sign-in flows and permission prompts that read wrong. Internal testers need no extra review, so it costs almost nothing to run a week of testing before you submit.
Can I invite TestFlight testers without App Review approval?
Yes. Internal testers, up to 100 people on your App Store Connect team, receive builds without any review step once processing finishes. External testers need a build to pass Beta App Review first, which is a lighter process than full App Review but still a queue and still a chance to be sent back. Invitations are sent by email, and each tester installs the TestFlight app to accept them.
What should I do if my first app is rejected?
Read the message carefully and identify the guideline Apple named, since rejections under 2.1 for incomplete apps, crashes or missing demo access are the most common. Fix the actual problem rather than the wording, reply in the Resolution Center with a short factual note explaining what changed, and resubmit the version. Do not submit a new version instead of replying, because the thread is where the context lives.
Conclusion
If you do one thing this week, enroll in the Apple Developer Program. That is the step with a waiting period attached, so it costs nothing to start now while you finish the app.
Then work the checklist in order: create the App Store Connect record, archive and upload from Xcode, run the build through TestFlight with internal testers, complete the listing and privacy details against real screenshots, and submit with working demo credentials and clear review notes. Test the exact build you are submitting on a physical iPhone, because that is what a reviewer will do.
Interface labels change between Xcode and App Store Connect releases, so trust the current labels in your own account over any guide, including this one. Verify the figures here against Apple’s developer pages before you submit.